Wednesday, August 31, 2011

Buttery Marsala Cream Chicken

This dinner was sooo good!  While it took some time to cook, it was easy to prepare and we gorged on the creamy Masala wine sauce.  I chose to make this sauce because I had some leftover cream from this weekend when I made cupcakes.  The figs made the sauce naturally sweet and tapioca starch thickened it up yet kept the meal gluten free.  


The Meat
- 2 chicken legs and thighs, meat removed in chunks
- thyme, rosemary, bay, coriander seed, salt, pepper, dill, crushed red pepper to taste

The Sauce
- 1 cup heavy cream
- 3 tablespoons butter
- 1/2 cup Masala wine
- 4-6 fresh figs, chopped into pieces
- 2 tablespoons tapioca starch (to thicken the sauce)

The Veggies
- 1 turnip, cubed
- 1 cup green beans, tips trimmed and beans cut

- 1/2 small eggplant, sliced into quarters
- salt, pepper to taste
- bacon grease for frying


Preheat your oven to 425 degrees.

Debone the chicken and layer it in the bottom of you baking pan.  Add the chopped figs and season everything well.  Mix together the other sauce ingredients and pour it all over the chicken.  Bake for 1 hour and 15 minutes.  

In a 3" deep pot, cover and boil the turnips and snipped green beans for around 25 minutes.  While they are cooking, grease your saute pan and cook the eggplant slices until they are soft on each side.  Use a wooden spoon to keep the eggplant moving in the pan, and re-grease as necessary to keep the eggplant from burning or drying out.  When the turnip and green beans are done, I tossed them together with the eggplant and seasoned all of them together. 


I layered the veggies on the bottom of the plates and poured the chicken and sauce all over the top.  Serve this dish with a spoon - you'll want to savor every last drop of the delicious, creamy sauce!

Monday, August 29, 2011

Curry Lamb Patties with Asparagus and Baked Eggplant

I love lamb.  This is such a rich and yet simple meal.  The eggplant is soft and savory, and the hint of curry powder makes each bite a little exotic and extra flavorful.  

The Meat
- 3/4 pound of ground lamb, divided into 2 patties
- curry powder, salt, pepper, lemon juice to taste

The Veggies
- 1/2 eggplant, sliced
- 1/2 heirloom tomato, chopped
- 1/2 medium sized red onion, sliced and diced
- 2 tablespoons olive oil
- 1/2 cup water
- salt, pepper, curry powder, parsley, dill to taste

- 20-24 asparagus stalks, bottoms cut off
- bacon grease for frying
- salt, pepper to taste

- 1/2 heirloom tomato, sliced

The Sauce
- 2 tablespoons Greek yogurt
- curry powder, salt, dill, lemon juice to taste

Preheat your oven to 400 degrees.


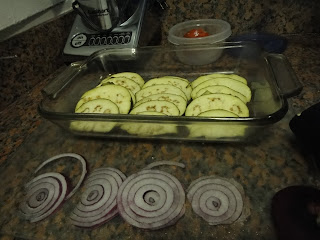
Layer your eggplant slices into a glass baking dish that can go into your oven.  Cover them with the chopped tomatoes and red onion.  Pour in the water and oil, and season generously.  Bake the whole shebang for around 25-30 minutes.


Season and make your lamb patties by dividing the ground meat and rolling it into two large balls, then slowly squishing it flatter with the palms of your hands.  Try to blend the meat together enough so it won't crack down the middle of your patties.


When the eggplant is around halfway cooked, grease your griddle pan with some bacon grease and on medium-high heat grill/fry up your asparagus stalks for around 6-8 minutes, rolling them so they don't char on one side.  Then cook your lamb patties on the same pan, using the leftover grease that's there from cooking your asparagus.  Flip the patties after around 5-6 minutes, and cook them another 5-6.  You want the centers of the patties to be slightly pink when you take them off, because they will continue to cook and you don't want to dry the meat out by overcooking it.  


When mixing your yogurt sauce, add curry powder a little at a time, blending well, until you have a taste you like and your sauce has the faintest tinge of curry orange to it.  Dollop it onto the cooked lamb, arrange the remaining slices of tomato, and serve!

Sunday, August 28, 2011

Rainbow Swirl Chocolate Cupcakes. Be EXCITED!


Oh my freaking gosh I created rainbow swirl cupcakes this weekend.  This had me excited and bouncing off the walls (or maybe it was all the shaved palm sugar).  This is a variation of the lemon raspberry cupcakes I made a few weeks ago.  The basic cake recipe is the same, I just altered a few things to make the cupcakes chocolate instead of lemon.  This time I put a simple whipped cream inside (making these non-vegan), but they don't need to be stuffed.  The cake is so moist and delicious!  

Also, this time I used organic, non-hydrogenated palm shortening as the base for my icing instead of the coconut oil.  I wanted a stiffer base so my icing could stand up to the trials of the abnormally nice weather San Francisco has been having lately.  This icing lasted in room temperature conditions much better than the coconut oil icing, which got a little melty, and very messy.  My kitchen was slightly less of a disaster zone this time around because I knew more of the cupcake making process - indeed, the cupcakes did not take a lot of effort now that I had all the ingredients stocked in my cupboards and knew what to do.  The rainbow icing experiment, while incredibly successful, was a bit on the messy side.  But all is rendered good when it comes to cupcakes.

I got the inspiration for the rainbow swirl cupcakes from this old blog post off of the blog Sara Bakes Cakes.  She didn't have instructions on how to do it, but in the comments I read that she had leftover colored icings from a different cake project, and she just put them all in the decorating bag and this is what came out.  I had to try it.  It's brilliant, beautiful, and every cupcake is a uniquely cool piece of art.  
AND THEY TASTE AWESOME.

The Cake

Wet Ingredients
- 1/2 cup frozen banana, thawed
- 1 cup unsweetened applesauce
- 1 tablespoon arrow root powder
- 1/3 cup olive oil (or light oil of your choice)
- 1/3 cup coconut milk 
- 2 teaspoon apple cider vinegar
- 1/4 cup water 
- 1/4 cup organic cocoa powder
- seeds of 1/2 vanilla bean (or 2-3 teaspoons of vanilla)

Dry Ingredients
   - 2/3 cup white rice flour
- 2/3 cup (don’t pack the cup) shaved palm sugar
- 1/4 cup tapioca starch
- 1/4 cup potato starch
- 1/3 cup almond flour 
- 1/4 cup coconut flour 
- 1/3 cup brown rice flour
- 2 teaspoon of baking powder
- 1/2 teaspoon of baking soda
- 1/2 teaspoon of salt

Preheat the oven to 350 degrees.

This time I mixed together the wet ingredients and beat it in a medium mixing bowl with my electric beater for around 2 minutes.  I added a little more thawed banana this time around, and estimated that 1/4 cup of pure cocoa powder would make my batter decently chocolatey without making it too bitter.  I stuck the mixture in the fridge for a little while to let it rest and so the arrow root could thicken it up a bit. 

In a larger mixing bowl, I sifted together all the dry ingredients.  I folded the wet ingredients into the dry ones and mixed them thoroughly. Then I spooned the mixture into cupcake liners in my baking pan.  I spooned it almost up to the top of the liner, just like last time.  


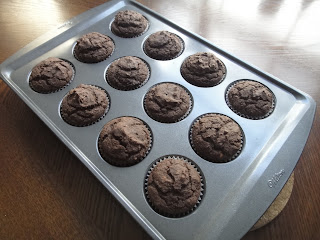
I baked the cupcakes for 21 minutes until the tops were solid and I could stick a toothpick in cleanly.  I let them cool in the pan for 5 minutes before pulling them out - I learned last time that they are slightly fragile.  The tops of the cupcakes split a tiny bit and almost looked like brownie cupcakes, but they stayed together fine (and ohmygod I just made chocolate gluten free cupcakes, rejoice).  Once again, I let the cupcakes sit out overnight before icing them.  They are much more firm in the morning, and they were easy to handle then.


In the morning, I cut circles into the tops of the cupcakes and very gently pulled out a cone of cake, making sure to leave plenty at the bottom so the filling would not fall through them.  That would be bad.  I cut off a bite of cake and put a dollop of the whipped cream inside.  There is a bit of finesse required to do this, as I learned before but did not manage to remember as I started working on filling the cupcakes.   Like before, my first cupcake top didn't fit right because I had put too much whipped cream inside, and then when I pressed down on it whipped cream shot all over the place (*cough*thatswhatshesaid*cough*).  I got the hang of it quickly (I put in half as much as I thought should go in, and I was golden). 


Next came the icing.  Rainbow lovers rejoice!


The Icing
- 1 cup grated palm sugar
- 1 tablespoon almond butter 


I wanted bold, beautiful rainbow colors for my swirled icing, so I made 5 different colors:  dark pink, orange, yellow, blue, and green.  I was impressed once again with the ability of the natural food coloring to produce awesome shades of colors.  The icing is a to taste kind of deal - if you want your icing sweeter or thicker, play with the ingredients until you get the right consistency.  


After you beat together your icing, separate it into five small bowls.  Put 5 drops of the pink/red dye into one bowl to make the dark pink color.  Put 3 drops red and 4 drops yellow into the second bowl to make the orange.  4 drops of yellow made the yellow icing bright and beautiful.  The blue icing took 6 drops to make it stand out.  The green took 4 drops of blue and 4 drops of yellow to get right.   Feel free to play with the variations of red/yellow/blue to get the shades you like best.


Put a teaspoon in each bowl.  Set up your decorating bag by snipping the tip and securing the 1M tip onto it.  Place one spoonful of each color into the bag at a time, until you get a globby, multi-colored mess going on inside.  BE CONSCIOUS OF THE TEMPERATURE OF THE ICING.  If it gets too warm it gets too gooey and the colors start to blend into a purple-brown bleh color.  You don't want that.  Pop your icings into the fridge for a minute to cool them down if you start to notice that they are getting gooey.  But you must be careful not to leave your icing in the fridge too long, or else it gets rock solid.  The palm shortening has a completely different texture and properties than the coconut oil - I preferred the workability of the palm shortening icing but personally liked the taste of the coconut oil icing a little bit better.  To each their own.  


With constant pressure, ice the cupcakes in smooth, continuous circular movements, starting with the perimeter of the cupcake and working your way around to the center.  Each cupcake will look a little different since you dolloped the colors in somewhat randomly.  Pop those finished beauties into the fridge because of the whipped cream.  Make sure to remove them at least 15 minutes before serving to ensure the icing isn't a rock solid brick, but soft and creamy, like icing should be.  


Love the rainbow (cupcakes).  Share the rainbow (cupcakes). 

Lunch Is Served

We love our light Sunday lunches.  This one is no exception.  The cucumbers add an element of crunch to the dish, while the plums are juicy and sweet, and the fresh mozzarella and slicing tomato are creamy and soft.  Each bite delights your taste buds in different ways, but all ways are good ways!

The Meat
- 2 chicken apple sausages, sliced

The Veggies 
- 8-10 stalks of asparagus
- bacon grease as needed
- 1 1/2 cups of raw spinach

- 1 slicing tomato, sliced (duh)
- 2 balls of boccioni mozzarella, sliced
- 2 teaspoons olive oil
- salt, pepper, basil, oregano, marjoram to taste

- 1/2 large cucumber, sliced
- 2 tablespoons Greek yogurt
- lemon juice, salt, pepper, dill to taste

The Fruit
- 1 plum, sliced

Slice the plum, cucumber, and tomato.  Place the cucumber and plum on the plate.  Mix together the lemon juice, salt, pepper, and dill into the Greek yogurt and spoon it over the cucumbers.  Toss the tomato with the mozzarella slices, olive oil, and seasoning, then put that onto the plate next to the cucumbers.  Place the plum on the other side of the plate so it doesn't sit in the olive oil from the tomato salad.  

I precut my sausages to make sure they cooked quicker and also to let each piece have that delicious dark brown grilled coating on it.  It took around 5-7 minutes to make the meat, flipping the pieces 1-2 times to prevent charring.


At the same time, I put a small dot of bacon grease and my asparagus on the same griddle pan, rolling them so they cooked evenly.  They also only took around 5 minutes to be soft and ready to eat.  Then I lowered my heat to a low setting and wilted my spinach in the leftover bacon and sausage grease.  

Put the cooked ingredients on the plate and serve!  It doesn't take much time and it is so enjoyable to nibble on every aspect of this dish!

Saturday, August 27, 2011

Cauliflower Potato Salad

We had a birthday barbecue to go to this weekend, and it was requested by the very lovely birthday girl that I make my Cauliflower Potato Salad and then post it on the blog, so she can steal the recipe ;)  

This served 8-10 people...so if you want to make it for yourself at home, you can halve the recipe (or make a lot and refrigerate it, because it's delicious and you'll happily eat it all week).  This potato salad goes great with all sorts of barbecue, as well as lunch meats or even by itself.

Cauliflower Potato Salad
- 1 head cauliflower, chopped
- 9 medium-large yellow potatoes, skinned and pierced with a fork
- 2 green onions, sliced
- 4-5 tablespoons hemp seed oil based mayonnaise
- 2-3 tablespoons stoneground whole grain mustard
- 3 teaspoons minced horseradish
- 2 teaspoons lemon juice
- 2-3 raw cloves of garlic, pressed (use this)
- salt, pepper, mustard seed, dill, paprika, basil, dried bay leaf to taste
- extra seasoning to sprinkle on top

In a large pot, boil the potatoes and cauliflower for around 25 minutes, until the potatoes break apart when poked with a fork.  Drain the water and put the hot potatoes and cauliflower into a large mixing bowl.  


With your potato masher, mash up both the cauliflower and potatoes for 45 seconds.  You should have a chunky mashed potato consistency with a few medium sized bites of potato in the mix.  Dollop the mayonnaise and mustard into the mixing bowl, then add the horseradish, raw garlic, and seasoning, and finally use a big spoon to fold all the ingredients together until the mustard and mayonnaise are evenly blended and you don't see globs of unmixed ingredients.  The potato salad should be a little creamy and a little chunky and have lots of kick to it, thanks to the raw garlic and horseradish floating around in there. 

Chill for at least 2 hours before serving.  To serve, sprinkle the sliced green onion and extra prepared seasoning on top of the potato salad to make it look all pretty and presentable.  Watch guests devour your potato salad and feel accomplished.  Enjoy the party/barbecue/lunch.

A Chipotle Themed Breakfast

Chipotle pepper is a smoky, wonderfully tasty way to spice up your breakfast!  Here I used chipotle powder in the hash browns and chipotle cheese on top of the eggs to incorporate the flavor into my dish.  It was a satisfying Saturday morning meal. 


The Meat
- 4 sliced bacon
- 4 breakfast links
- 4 eggs

The Veggies
- 2-3 yellow or purple potatoes
- 2 slices of red onion, diced
- 1 mushroom, diced
- salt, pepper, chipotle powder, dill to taste

The Garnish
- grated chipotle jack cheese

Fry up your bacon and links on your griddle pan on high heat, turning the meat every few minutes to reduce charring.  Chop up your potatoes into small, mini-bite size pieces and toss it with the seasoning and red onion.  Put the hash brown mixture onto the griddle pan with all that delicious bacon grease.  Fry up those potatoes for 4-6 minutes, turning them occasionally with a fork so they don't get black and charred. They will be a mixture of soft and crispy and taste great.

I made my eggs over easy and my husband's eggs over medium in the same griddle pan, with the same grease and leftover spices/bits of delicious food that was leftover.  Be careful not to break the yolks when you flip your eggs - test the edges of the eggs to make sure the egg is cooked through enough to withstand being flipped, and be delicate with them!  Put everything on your plate when it is all cooked, and sprinkle some grated chipotle jack cheese on top of your eggs. 

I loved this meal not only because it was great tasting, but it only took one pan to make.  Hooray, less cleanup!

Friday, August 26, 2011

Rejoice! Garlic Stuffed Veal Roast!

Hooooly stuffed veal, Batman.  This is a joy to eat.  The poached garlic wrapped inside the succulent veal is ahhhhmazing.  I paired the meat with roasted squash, carrots, and potatoes.  Go ahead and pour yourself some red wine and relax! It is the perfect way to celebrate the weekend.


The Meat
- 1 1/2 pounds veal roast
- 1 cup poached garlic
- 1 tablespoon pesto
- 1 heirloom tomato, chopped
- 1 tablespoon butter
- salt, pepper, basil, marjoram, onion powder to taste

The Veggies
- 2 large heirloom carrots
- 2-3 medium yellow potatoes
- 2 large zucchini squashes
- 1/2 cup water
- salt, pepper to taste

- 1 head (or more) of garlic, peeled
- 2 cups chicken stock

Preheat your oven to 375 degrees.

Chop your veggies into large pieces and arrange them in a shallow glass cooking dish that can be put into your oven.  Season them and pour the water into the bottom of the dish.  Stick the veggies into the oven, uncovered, for around 35-40 minutes.

In a sauce pot, bring the chicken stock and garlic to a boil and poach the cloves for around 15 minutes.  Remove the garlic from the stock.  Cut a slit into the side of your veal roast and carefully open it up (like a giant pita pocket made of meat). With the back of a spoon, spread the pesto along the insides and then place the garlic inside.  Chop up the tomato and put it in a baking dish with the butter and some extra cloves of poached garlic.  Close up the veal roast and put it in your baking dish, on top of the tomatoes.  Season and when you are ready, up your oven's heat to 400.  Cook the veal roast for only around 10-15 minutes - it cooks quickly and you don't want it to dry out and get tough.  Check it until it is well cooked on the outside and pink in the middle - the veal will keep cooking after you remove it from heat and slice it.  


This meal didn't need anything else.  I put the veggies on the plate (you can toss some of the leftover garlicky chicken stock onto them if you'd like) and drizzled the pan drippings and baked tomatoes over the top of the roast.  It was amazing.

Thursday, August 25, 2011

Supreme Poached Eggs

I used my poaching pods to make my eggs this morning!  They are so easy to use and make such delicious poached eggs.  It's fun to shake up the breakfast routine every now and then - while my husband never seems to get bored, he does get a lot of the same ingredients presented in different ways.  It's an excellent challenge for me to use the same things over in new ways (if you look at the last three breakfast meals, they all use almost the same basic ingredients, but each are different and awesome in their own way!)

The Meat
- 2 slices bacon
- 3 breakfast links
- 2 eggs

The Veggies
- 3 slices of sliced tomato
- 1/3 cup raw spinach
- 1 mushroom, sliced
- 1/2 green onion

The Sauce
- 1 teaspoon French dressing (it's mostly primal...I'm a bad Grok)
- 1 teaspoon hemp seed oil based mayonnaise


The Fruit
- 1/2 pear, sliced
- 3-4 strawberries, sliced


Cook up the meat on your griddle pan, on high heat.  Flip your bacon at least twice and keep rolling the breakfast links around so they don't char too badly.  After I cooked up the meat all delicious and crispy, I put the spinach, mushrooms, and tomatoes on the griddle pan for around 3 minutes to make them all soft and tasty counterparts to the meat.


Meanwhile, put around 3-4" of water into a simmer pot and bring it to a boil.  Once you get a rolling boil, grease your poaching pods, crack your eggs into them, turn off your heat and slip them into the water.  Cover the pot with its lid and set your timer for 4 minutes.


Put the fried tomato slices on the plate first, then layer the spinach and the poached eggs on top (imagine the tomato slice is an English muffin).  Mix up the French dressing (don't judge me for my small indulgences) and the mayonnaise and spoon it onto the poached eggs.  Cut up the green onion over the top (you could substitute chives if you wanted!) and arrange your fruit in a pretty pattern so you feel all special like.  


Wednesday, August 24, 2011

Thai Basil Curry Crockpot Goodness

I. Love. My. Crockpot.  We received it as a gift for our wedding in the spring, and ever since then I use it regularly to make delicious curries and slow-cooked meats.  I love it because I will make the meal right before I go to bed, and when we wake up in the morning, we open the bedroom door and our entire home is drenched with delicious aromas.  Then I send my husband off with his Thermos.  This is a great Thai curry with lots of savory spice and hints of coconut.  


The Meat
- 1 pound of beef stew meat

The Veggies
- 1/2 head cauliflower
- 8-10 carrots
- 3 yellow potatoes, skinned and chopped into large pieces
- 1/3 eggplant, chopped into large pieces
- 2 summer squashes, chopped into large pieces

The Sauce
- 1 cup coconut milk
- 1/2 cup water
- 1 teaspoon onion powder
- 2 tablespoons Thai chili paste
- 1 tablespoon coconut oil
- 1-2 teaspoons tamarind puree
- 1 teaspoon tapioca starch
- 2 teaspoons lime juice
- salt, garlic powder, lemongrass powder, basil, coriander to taste


Chop all your veggies the night before, and toss the raw meat and veggies in the crock pot.  I make my veggie pieces extra large, because they get so soft in the Crockpot that if they are small they will literally cook away to nothing.  Mix together the sauce (or, you could be lazy and buy World Foods' Thai Basil Curry Stir-Fry Sauce.  It has sugar in it, but is gluten free, and has no artificial preservatives or genetically modified ingredients.  Use the whole jar).  Pour the sauce over the veggies and meat, turn the Crockpot on "low" heat, and let it cook overnight (around 6-8 hours).  Go to sleep.


When I wake up, the first thing I do is open my eyes and wish I could sleep later...then I get up and go turn the Crockpot setting to "warm." I send my husband to work with a Thermos of curry and some crunchy apple slices and nuts.  The veggies and meat are SO soft, they melt in your mouth.  I use a slotted spoon to get the curry from the Crockpot to the bowl/thermos, because there is usually greasy liquid at the bottom of the Crockpot.  It is tasty too though if you feel like splashing some into your meal.