Dream of this: Lemon Cupcakes with a Raspberry filling and a combo of flavored icings that make the cupcakes look like sunflowers.
Welcome to reality.
This recipe takes a LOT of work and a LOT of time/money the first time around, but once you have all the ingredients and get the mixtures down, you can make (mostly) primal cupcakes with relative ease. There is a small amount of brown rice flour and white rice flour in the dry ingredients which keeps the recipe from being completely primal, but they are vegan, gluten free, processed sugar free, soy free, and xanthan gum free. You don't have to be insane like me and stuff them with homemade jam, or spend hours decorating them to look like flowers. You can, but they'll be delicious even if you don't. These cupcakes are fluffy and light and unbelievably tasty. They are the cake you've been searching for.
I wish I could take full credit for these awesome creations, but I can't. I stumbled upon this recipe during my search for a primal cupcake, and I love this woman and her blog: http://www.myrealfoodlife.com/ She is an inspiration and I wish I lived nearer to her - I'd become her faithful apprentice; really, she's amazing, and she gets the credit for the recipe. I just found it and followed it.
I stuck to her recipe for the actual cake part with only a few small changes, but deviated a bit from her directions for the raspberry filling and icings. I made my cupcakes and filling the night before, and then stuffed and iced them the next morning. I think the night of cooling/solidifying really helped the cupcakes keep their form, since they seemed wet/crumbly right out of the oven. By morning they were able to withstand being cut open and handled for icing.
The Cake
Wet Ingredients
- 1/3 cup frozen banana, thawed
- 1 cup unsweetened applesauce
- 1 tablespoon arrow root powder
- 1/3 cup olive oil (or light oil of your choice)
- 1/3 cup coconut milk
- 2 teaspoon apple cider vinegar
- 1/4 cup water
- 2 teaspoon homemade lemon extract (see below)
- zest of 1 lemon
- seeds of 1/2 vanilla bean (or 2-3 teaspoons of vanilla)
Dry Ingredients
- 2/3 cup white rice flour
- 2/3 cup (don’t pack the cup) shaved palm sugar
- 1/4 cup tapioca starch
- 1/4 cup potato starch
- 1/3 cup almond flour
- 1/4 cup coconut flour
- 1/3 cup brown rice flour
- 2 teaspoon of baking powder
- 1/2 teaspoon of baking soda
- 1/2 teaspoon of salt
Preheat the oven to 350 degrees.
First I made my lemon extract. It took me 7 medium-large lemons to squeeze out the cup of fresh lemon juice I needed to make the extract. I let the juice boil down to a dark syrup, it took around 25 minutes. Make sure you store it in tupperware or glass immediately, because it gets hard as it gets cool. I keep my leftovers in the fridge and when I want to add some to a dish I just pour in a tiny bit of water and then quickly pour the water back out. This stuff is SUPER potent and you don't need much at all to get an intense lemon flavor.

Then I mixed together the wet ingredients (minus the lemon zest) and beat it in a medium mixing bowl with my electric beater for around 2 minutes. I stuck it in the fridge for a little while to let it rest and so the arrow root could thicken up the mixture a bit. In a larger mixing bowl, I sifted together all the dry ingredients. I folded the wet ingredients into the dry ones and mixed them thoroughly, adding in the lemon zest. Then I spooned the mixture into cupcake liners in my baking pan. I spooned it almost up to the top of the liner.
I baked the cupcakes for 21 minutes until the tops were golden brown and I could stick a toothpick in cleanly. I let them cool in the pan for 5 minutes before pulling them out - they seemed fragile. The bottoms of the liners seemed a little wet, and they were also a little greasy, I think it's from the olive oil. I let the cupcakes sit out overnight before icing them. They seemed much more firm in the morning, and they were easy to handle.
While my cupcakes were baking/cooling, I made the raspberry filling. I deviated from Alea's recipe here and winged it a little bit. Also, I didn't strain my filling because we don't mind the seeds, and to be honest...I was already putting in a ton of work and didn't want to deal with the pain of straining a jam-like substance. Feel free to be ambitious if you want seedless filling.
The Raspberry Filling
- 1 package frozen raspberries
- 1 package fresh raspberries
- 1 small package fresh strawberries
- 2 tablespoons grated palm sugar
- 2 tablespoons seedless raspberry spread (I used Crofter's because it has fair trade sugar)
- 1 teaspoon vanilla extract (optional)
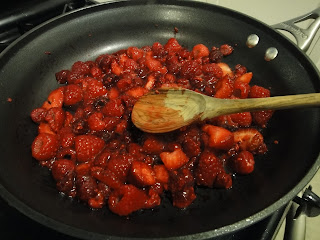
I put all the frozen and fresh berries into my deeper saucepan and cooked them, occasionally stirring the mixture so it didn't stick, for around an hour. By the time it was done, all the berries had turned into soft, warm goop. I added my sugar, spread, and vanilla and stuck it in a bowl to cool. I refrigerated the filling overnight. The filling had the consistency of jam and was sweet without being too sweet. It worked well with the crumbly, soft cupcakes.

In the morning, I cut circles into the tops of the cupcakes and very gently pulled out a cone of cake, making sure to leave plenty at the bottom so the filling would not fall through them. That would be bad. I cut off a bite of cake (which my husband quite gladly disposed of for me) and put a dollop of raspberry filling inside. There is a bit of finesse required to do this. My first cupcake top didn't fit right because I had put too much filling inside, and then filling squished out when I pressed down on it and my cupcake top looked...well...bloody. Ew. We want beautiful, delicious looking cupcakes, so err on the side of safety and put in a little filling at a time, making sure not to overstuff.


Finally my cupcakes were stuffed and ready for some icing! I made three types of icing: coconut flavored icing (for the leaves), chocolate icing (for the centers of the sunflowers) and lemon icing (for the sunflower petals). They were all sort of coconut-y though because I used coconut oil as my base. The icing was delicious but DIFFICULT to work with. The coconut oil would make the icing a little liquid-like if it got too warm, so after mixing my icings I stuck them in the fridge, and took them out in shifts to decorate my cupcakes. Don't leave the icing in the fridge too long though, because then it will get HARD and be stuck in the mixing bowl. Sigh, it was pretty much a pain, but the taste was worth it! My kitchen was a disaster zone afterward and I was a mess, but the cupcakes were worth it. When I was all done I kept the cupcakes in the fridge - they seemed more solid compared to being left out, and the icing definitely needed to be kept cool.
- 1/2 cup grated palm sugar
- 1 tablespoon almond butter (we had no cashew butter which sounds yummier)
- organic, chemical free, natural food coloring
I mixed my icing and then separated it into three small bowls. If the consistency is off for you, add more sugar/almond butter/whatever as you deem necessary. I added 1 tablespoon of organic cocoa powder to one bowl to make it chocolate icing. I added some yellow food coloring and 1 teaspoon of my lemon extract to make the yellow lemon icing. I added just some blue and yellow food coloring to the last bowl to make the green leaf icing.
First I dabbed on the chocolate icing over the tops of the cupcakes, and stuck them all in the fridge. Then, one at a time, I took them out and added the green leaves to the cupcake tops. I used a decorating bag with icing tip #352 for both the leaves and the petals. I have two #352 tips, which was awesome, because it would have stunk having to clean the tip halfway through the process. I made each cupcake a little different - have fun with the decorating process! Some had three leaves, some had four, and one even had five.
After the leaves were all on, I switched to the yellow icing and had some fun filling in the spaces left. I tried to ripple the icing up and away from the center, and didn't worry too much about if it was a little messy, because flowers aren't perfect and the texture made them look more realistic! I tried to have some of the tips of the petals twist up into the air, also. I think they came out great (well, some better than others - you get the hang of it after a while)!
They tasted amazing and were sooo much fun to display on my tiered plate. It made us all feel really great to enjoy a cupcake without worrying about eating refined sugar or chemicals or fake stuff. Now that I've got all the ingredients and have a better idea of how to make them, I'm going to experiment with different flavor combos and new decorating ideas. :)


